How to build a hydroponic system, or an aquaponic system, has been a continuing theme here on GardenFork.TV . If are interested in building hydroponic or aquaponic or aquaculture systems, the following how to by GF contributors Stephen and Abbie on building an aquaponics system is full of great photos, click on the Next Page link at the bottom of each page to get to the next one. Eric.
We started with a greenhouse (a rebuilt shed) ( size: 7’ wide by 15’ long ) in 2006.
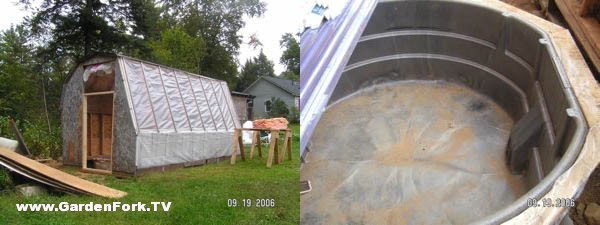
Aquaponics Shed & Fish Tank
We used a 300 gallon “Rubbermaid brand” stock-tank (recessed in the ground) for the fish tank.
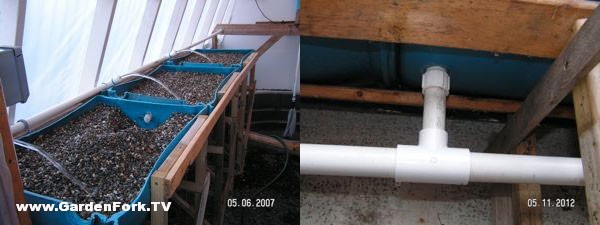
Use 3....55-gallon “food-safe” plastic barrels, cut them in half lengthwise so you have 6 grow-beds, approximately 2’ wide by 3’ long by 12 inches deep. By the way a 300 gallon fish tank will allow 8 such grows-beds...
[wide]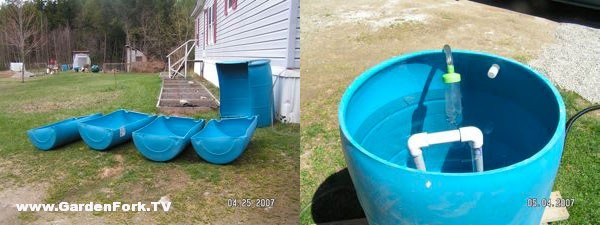
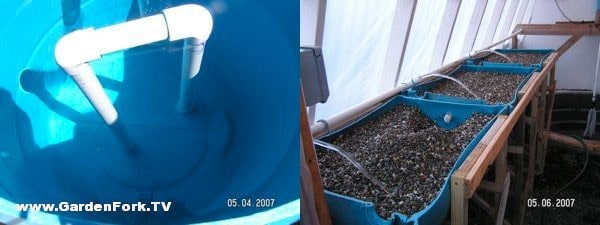
Use another 55-gallon drum, cut out the top (leave the rim, for strength) this is a dump-tank for the “Flood and Drain” system. Inside the dump-tank you need a syphon, attached below, to fill line for grow-beds.
Use some PVC (polyvinyl chloride) pipes to run water feed-lines from the “bottom of the syphon” (of the dump-tank) to each grow-bed. I used two lines running down both sides of the greenhouse to feed the 6 beds (three beds on each side). Or you could have all beds “side by side” on one side of your greenhouse using one line. (we tried that, but they didn’t fit “in a row” in our building). Position the grow-beds higher than the fish tank. (We need the dump-tank to flow into the grow-beds and the grow-beds to flow into the fish tank).
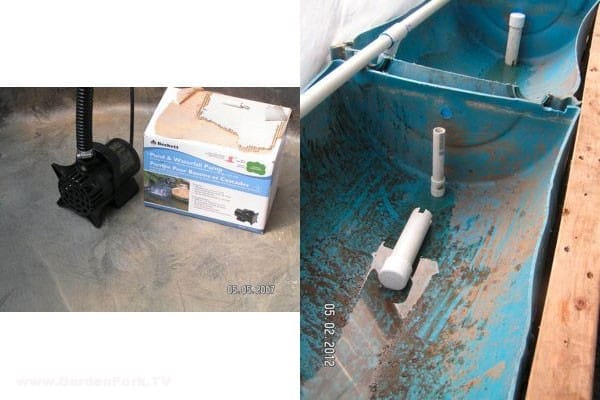
Place a waterfall/pond pump at the bottom of the 300 gallon fish tank, and run a pipe (from the pump) up to the top (and inside) the dump-tank so it will fill the dump-tank. This pump will be the only pump in the system and it will run 24-7 (all the time).
OK, so at this point we have the water leaving the fish tank entering the dump-tank, that fills until the water level reaches the top of the syphon, which then activates, the water will start to flow through the syphon pipe, down to the feed-line going to the grow-beds, which will fill with nutrient rich water (from the fish waste/poop). OK, we’ll need additional syphons (to drain the grow-beds) and a drain-line to return water to the fish tank. The white “upright” pipe attached through the grow-bed, with a covered/capped pipe slotted on the base (allows water into the syphon), and down into the drain-lines to the fish tank...
NOTE: IF for some reason the pumps stops.... most of the water (in this system) will drain back into the fish tank... some may remain in the dump-tank... some may remain in the grow-beds... but the majority of the water will return to the fish tank, keeping the fish alive... we’ve lost electricity for three days, the fish and plants were fine. Our system is stocked with goldfish and KOI (pronounced like “Koy” ...as in Roy-- with a K).
The grow-beds should be dry on the surface (which is good); about 1 inch lower, it will be moist/wet.
We fill the grow-beds: We use “pea-stone” or “pea-gravel” (normal gravel that is screened to allow only pea sized rock to remain); we fill the beds up to within 1” of the top of the grow-beds...
Make sure the grow-bed syphon is installed and add pvc drain-lines from bottom of grow-bed to the fish tank. The top of the syphon should be 1 inch lower, than the gravel surface...
Continued on next page

Billy Joe Anglon
can I get detailed drawings of lay out on pipe size, and pump flow
Scott
Could you give me detailed drawings on your entire system? I would really like to try this.
Thanks, Scott
Eric
sorry, we don't have a drawing. thx!