
Here's how to put together an insulated inner cover for your beehive without having to buy a new cover or build one. I learned this method from Phillipe at MudSongs.org , he has some great info on his beekeeping site, very down to earth.
An insulated inner cover reduces or prevents condensation in the beehive in winter.
Why does this matter? Condensation is water that collects on the top of the hive. It forms on the side of the inner cover that faces the bees. When enough water collects, it will drip back down onto the bees. Not a good thing.
Wet bees are dead bees.
Especially in winter.
How does this cover help? Condensation happens when warm air meets a cold object. In the beehive in winter, the bee cluster is warm, and there is some humidity in the air. When the warm air from the cluster rises and hits the cold inner cover, the water vapor condenses and drops back onto the bees. Not good.
The insulation that sits on top of the inner cover here keeps the cover from getting real cold, thus reducing or eliminating condensation. Since I have been using the insulated inner cover, I have not seen signs of condensation in the hive. If you find mold in your hives, you have condensation, FYI.
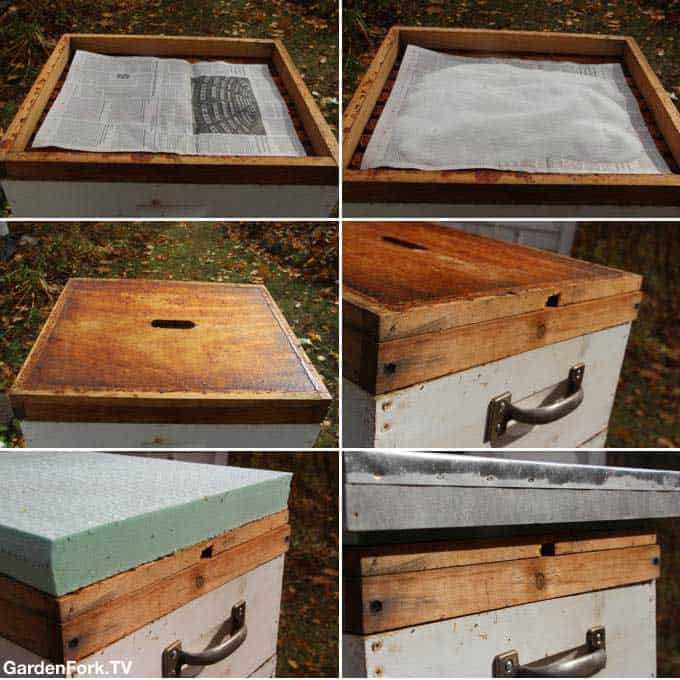
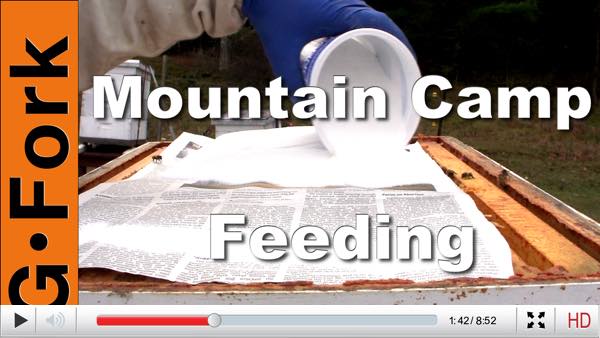
My variation on the insulated cover is to put a shim between the upper super and the inner cover. I then put sugar on top of the frames, using the dry sugar, aka mountain camp, method. This sugar provides a backup food source, and absorbs moisture in the hive.
Be sure the slot of the inner cover is not covered, one should always provide an upper entrance to the hive, plus it allows for air flow. Yes even in cold weather, I believe a hive needs some air flow, so provide an upper entrance. Remember to invert the inner cover.
You should also insulate the sides of the hive.
 Here is how to stack the parts of the top of the beehive, top to bottom:
- Outer cover sits on top of insulation, and usually covers it.
- Insulation - I use 2" thick polystyrene.
- Inner cover, turned upside down, flat side faces upward.
- Spacer shim, with dry sugar on top of newspaper.
- Top brood super
I built some DIY insulated inner covers that are more involved than this stack method, and they work well for me. If you are handy, have at them.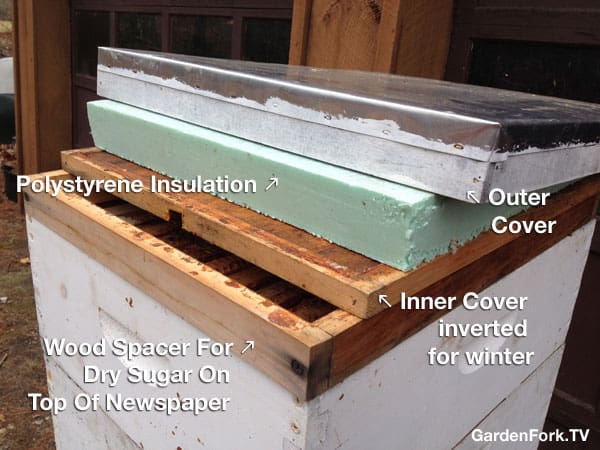
Carl
Hello Rick,
I recently viewed and enjoyed your video addressing hive insulation. I would like to ask about insulating the top of the hive by placing foam between the outer cover and an inverted inner cover. If the hole in the rim of the inner cover is open, won't that allow heat to escape from the hive? The bees would have to consume more food to generate more heat to maintain the hive temperature. Also, do the bees chew up the foam which covers the hole in the center of the inner cover?
Eric
i have not seen bees chew the polystyrene, and i believe you need an upper entrance, so I leave it open. has worked for me in Northwest Connecticut, where it get to 10F a few times a year each winter. thx.
Nadine
Hi! I am also a new beekeeper but noticed on your winterizing video that you put the inner cover back on with the ventilation notch up, I am fairly certain the inner cover should be turned over o the small opening is on the bottom so the bees get ventilation and have a door in winter if the bottom is covered in snow. I turned the inner over and bought a pre-made wrap, and cut a small hole where the opening is in the inner cover so they can exit and enter and have ventilation through winter.
If your inner cover has the opening facing up, like in summer, they won't have good ventilation, unless I missed an opening you made in your winter wrap....just saying....
Leanne
Hi
I just wanted to know the building instructions of the insulated cover ( the start of your video with it by it in not for bees to have exposed to the foam
Kind Regards
Leanne