
This post may contain affiliate links, it helps us pay the bills, more info here.
This is a homemade maple syrup evaporator made out of a metal filing cabinet. It is brilliant and works really well for how simple it is. Using free or almost free stuff, you can make a DIY evaporator. Most of the items I had around the garage or shop.
Couple of things first:
• Use this information at your own risk.
• Wear the proper eye, hand, mouth, ear protection when using power tools and assembling any DIY project.
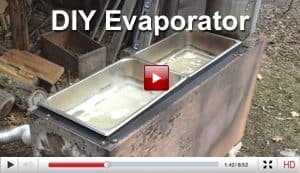
If you haven't already, watch the two videos we made about the file cabinet evaporator. One is a time lapse of the evaporator build, the other is a walk through of how to use the DIy evaporator to make maple syrup. Then go through the photos and info below.
Tools you will need:
Cordless drill, having a flip bit is real handy.
Right angle grinder with a metal cutting blade. Have several spares on hand.
New metal cutting drill bits slightly smaller than the screws you are using.
Self tapping screws #8 x ¾
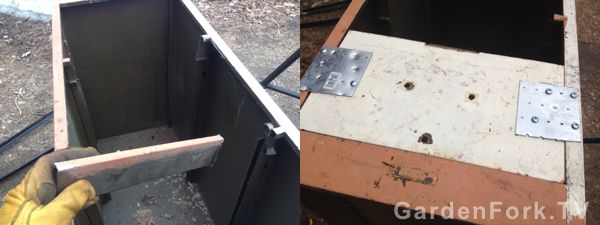
Angle Iron or a metal bed frame you can cut up.
2 hinges - almost anything will work, I recycled some I had laying around.
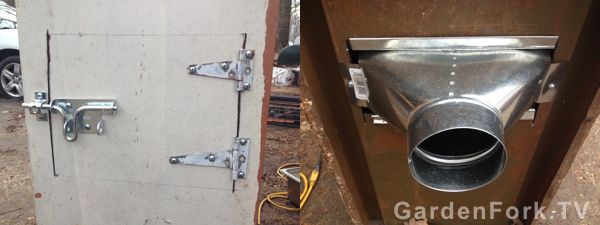
Metal hasp for fire door
4" vent pipe 4' - 6' long
4" to heat vent metal duct to connect chimney to cabinet
4" metal vent elbow
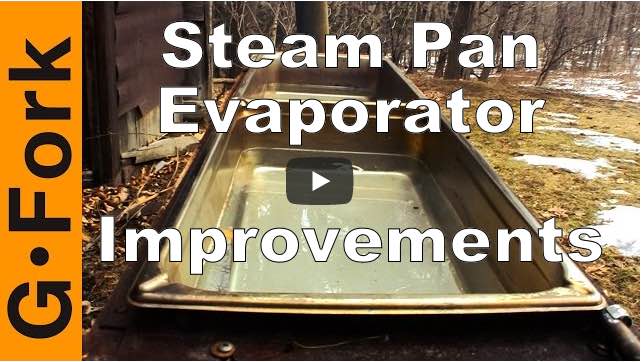
Full size steam table trays
Zip screws for sheet metal
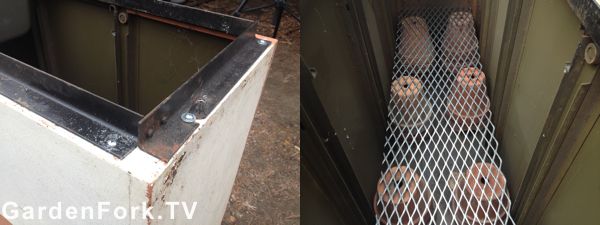
Terra Cotta garden pots or firebrick or some other heat resistant objects
Steel grate the width and length of the cabinet. This one is 12" x 48"
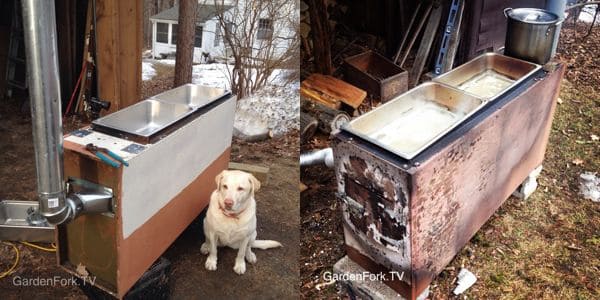
After you build this, fill the pans with water and fire it up. Let it burn for an hour or however long it takes for the paint to blister. I scraped the blistered paint off and put it in the trash.
Some paint will remain, as you can see in the photos.
I tried different lengths of pipe for the chimney. It helps if the chimney is higher than your head, so you get less smoke in your eyes.
The steam table trays need the angle iron to suspend them over the fire. Do a dry fit with all the angle iron and pans in place before screwing them in.
In the video, I attached a bathroom fan to the evaporator. I discovered I did not need to use the fan, as I was burning scrap lumber, which burns hot and fast. If you are burning firewood, you may want to attach one. Its better if you attach the fan to the front of the evaporator rather than the side like I did.
I did not have an adjustable air intake, I found if I kept the door slightly open, that worked very well.
I used terra cotta pots and steel grating to raise the fire up closer to the pans. I found this worked well for me. I did not line the evaporator with firebrick. Though I could see lining it would make it easier to stand next to the rig and carry the heat better. If the fire died down, the boil did too. Firebrick may have helped that.
For Version 2.0 of this homemade maple syrup evaporator, I will move the pans closer to the chimney, and have that extra space that I filled in with a piece of drawer right above the firebox door. The area right near the front door was not nearly as hot as the rear of the box.
This design is based on one by Mike Bell of the Hinkel Garton Farmstead, I learned of it by listening to Annie Corrigan on Earth Eats, a WFIU radio show and podcast. Here is a set of photos on their Flickr page
Check out how I improved the original design in this video:
greg
hi, was wondering did you use regular galvanized pipe for this? thanks
Eric
Yes, its regular flue pipe. You can use black stove pipe, but this is what I had in the shop. thx!