
At a friend's house, they had a broken motion sensor light over the back door. They wanted to repair or replace the motion sensor, and I suggested getting rid of the motion sensor light and install do an outdoor dusk to dawn light install instead. Motion sensor lights always seem to break. And the light fixture is always high enough you need a ladder to repair or replace them.
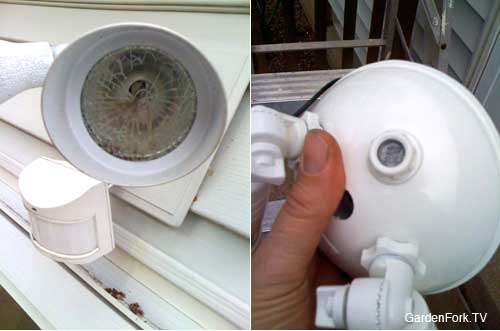
Broken Motion Sensor is replaced by dusk to dawn light
The reasons behind my idea to to an outdoor dusk to dawn light install
- The existing motion sensor fixture used halogen bulbs, which use a bit of energy to run, and burn out easily, I think.
- Use good quality LED lights in the dusk to down light fixture. A
- well light back door all night, and it would turn off automatically, and probably last a lot longer than the typical motion sensor light.
Full Disclosure, I am a big fan of LED lights. I use them everywhere I can.
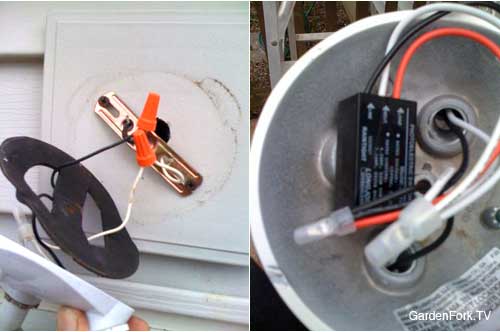
Black unit on right is the dusk to dawn sensor, easy to replace.
I chose a dusk to dawn light that was similar in design to their existing light, and made sure it was one that you could replace the light sensor on. This way, if the sensor breaks, you can replace it and not the whole light fixture again.

The usual rule of working with electricity apply here. Turn off the power that feeds the outdoor light, and use a non contact voltage tester to make sure the power is off in the fixture mount. Exercise extreme caution when working with wires and electricity. I think you are capable of doing this, but be sure to follow all directions that come with the light.
Tools you will need for this job are:
-
Good quality wire strippers

-
Non-Contact Voltage Tester
- wire nuts - these are usually come with the new light
-
6 in 1 screwdriver
- my favorite tool ever
Leave a Reply