
Sink leaking? I bet the gasket in the sink strainer is leaking. This is a DIY plumbing repair I did at a friend's restaurant, but the concept is the same. But if you need to fix your leaking chef kitchen sink, this is how to repair a leaking sink.
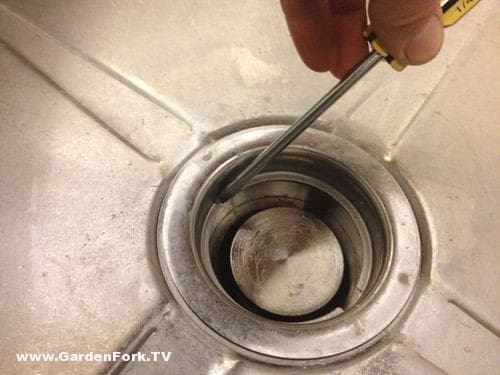
Using a screwdriver and hammer to unscrew the ring in a commercial sink
For this sink, which is a bit more industrial than your average sink, you remove the top ring from inside the sink. For most household sinks, there is a ring with tabs on it that attaches the sink strainer to the sink itself. For either type, you can buy a fancy tool to remove the ring, or you can use my favorite tools, a hammer and a screwdriver.
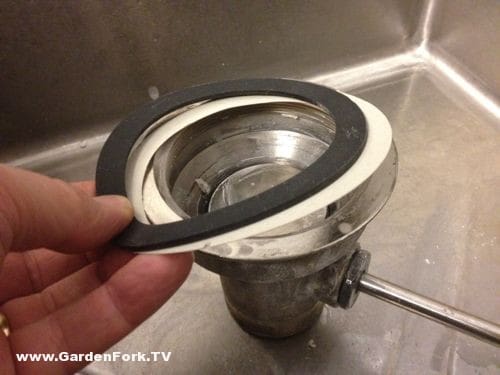
Rubber gasket, cardboard ring and sink basket assembly - restaurant sink
First remove the pipe that is connected to the strainer - this is called a tailpipe, btw. Tap on the tabs under the sink to move the ring counterclockwise. You might have to jam a screwdriver into the basket from the top to keep it from spinning. If you break the tabs, its ok, you can go buy a new sink stainer for cheap, and its shiny clean too.
Home kitchen sink
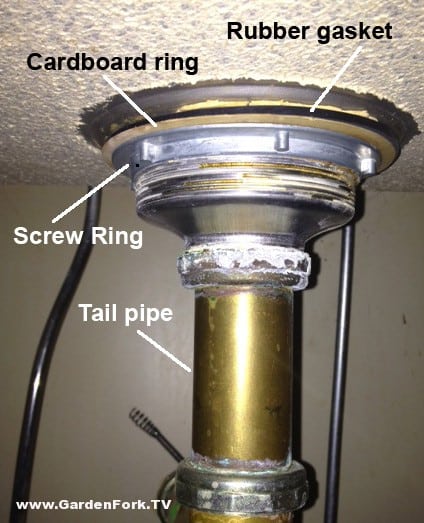
Remove the the strainer, and clean it and the sink surfaces. There may be old plumber's putty around the hole in the sink. Pick up a new gasket at your local hardware store, it will be a rubber gasket that also comes with a cardboard ring. If you are using the old sink strainer and there was plumber's putty on it or the inside part of the hole in the sink, roll out a long hot dog of plumber's putty about ¼' in diamter, and wrap this around the sink strainer and place the sink strainer back in the hole. Press down on strainer to squish out excess putty.
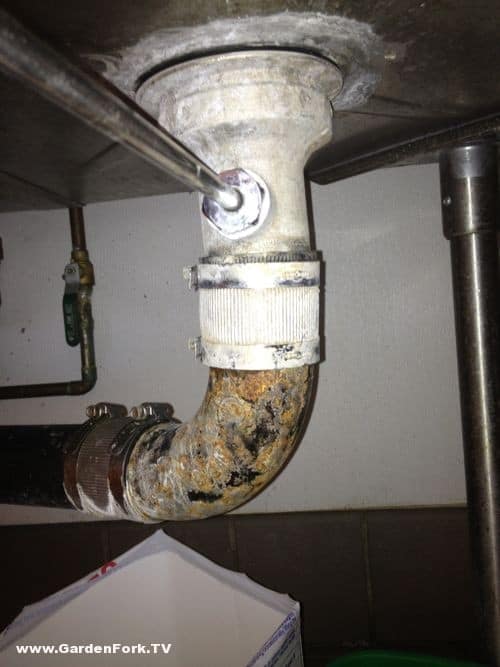
Gasket replaced, no leaks! ( how unusual for Eric... )
From underneath, place the rubber gasket onto the strainer, then the cardboard ring, then screw on the metal or plastic ring. For this restaurant kitchen sink, its a little backwards, but you get the idea. Screw the ring on tight, but don't break the ring getting it tight.
Re-attach the tailpipe - the piece of pipe that connects the sink to the drain pipes- and fill the sink with water, and check for leaks. If it leaks, you may be able to just tighten up the ring a bit, if that doesn't work, it may be that the sink hole is warped or has some crud in it that is not letting the gasket seal tight. You'll have to take it apart, clean up the hole, and re-assemble.
Have you done some DIY plumbing repair? Let us know below:
Alex
I forgot to install the large gasket that goes under the sink, is that going to be a problem?
Eric Gunnar Rochow
you should go back and put that gasket in, it may leak otherwise! thx, eric.
Wm
Can I use another material such as plastic cut to size to replace lost friction gasket?
Eric
@Wm, no sorry. you should use the same material, you can buy it at a hardware store. thx!
charles cressman
What is the purpose of the cardboard ring??
I am repairing a leaking faucet and the cardboard ring has disintegrated.
All other parts are OK. The leak was caused by rubber gasket being misaligned in the back where it was not visible..
charles cressman
What is the purpose of the cardboard gasket??
The rubber gasket and other pieces are OK as the problem was a misaligned rubber gasket.
Eric
i have to admit I don't know, but this is in the instructions, and there must be a reason. now I have to figure that out. thx!
Dan Merkle
The strainer ring with the notches will not move. I have the t&s removal tool but still doest budge.
Any suggestions?
Eric
@Dan, it can be a real pain to get the ring to move. You can try to hit around the ring with a hammer to try to break corrosion that is locking up the threads.
paula
The cardboard washer is only there to keep the rubber washer from being twisted by the lock nut when it's being tightened, it basically acts as a lubricant.
Eric
@paula, good to know! thanks for the info. eric.
cheapskate
it was easier for me to remove the basket/strainer and its tailpiece (sic) without separating them, because my tailpiece is plastic. no tools needed to make/break plastic pipe joints 🙂
the friction ring prevents the lock nut from binding with the gasket, like a washer in a smaller threaded connection. (my favorite big box store sells a wrench for this nut. it works quite well.) so you can fabricate a ring from salvaged material.
using the lock nut as a template, i made a cardboard ring. saved a little cash and a trip to the hardware store!
finally, i put PTFE tape on the threads. the nut turns smoothly this way, and we all have more PTFE tape than we need?